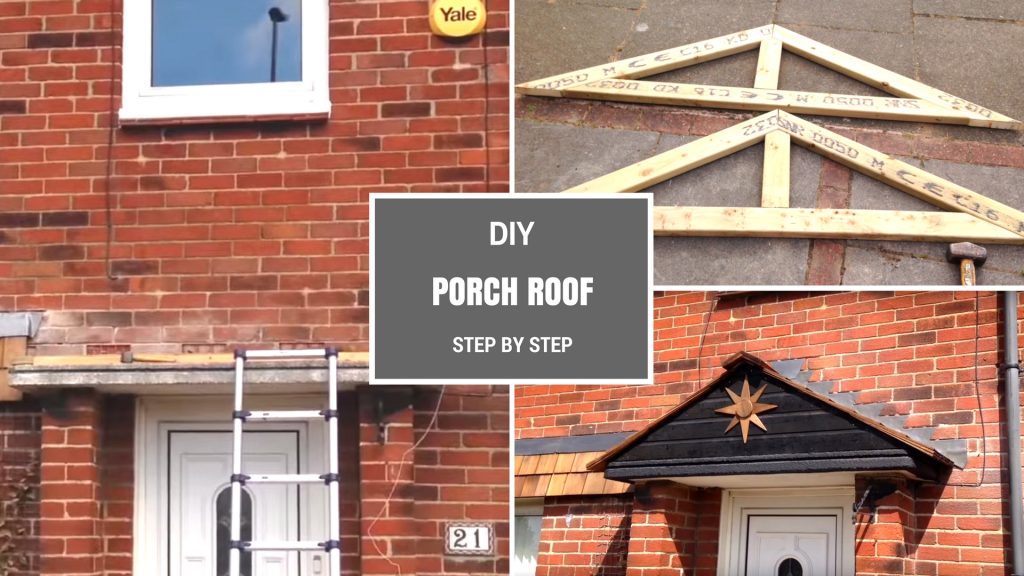
Want to know how to build a DIY Porch Roof? In this post and video I will show you exactly how I made a small pitched roof, step by step. For a maintenance-free finish I used cedar shingles as roof tiles and charred wood cladding on the gable.
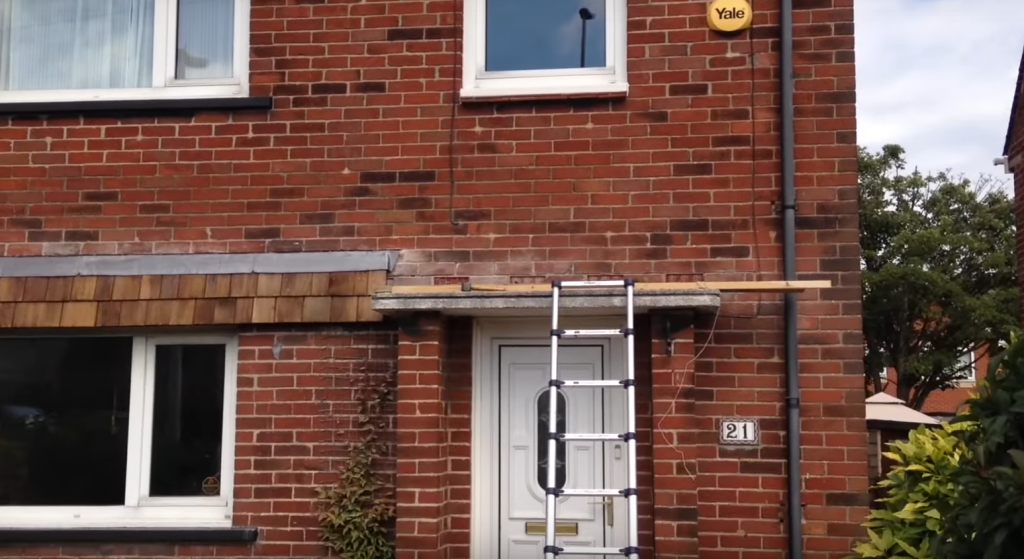
Our house in the UK had a flat concrete roof above the front door. I didn’t think it looked particularly nice and, whilst tackling damp at the property (caused by cracked lead flashing along the window lintels), I decided to build a small pitched roof to go on top of the flat roof.
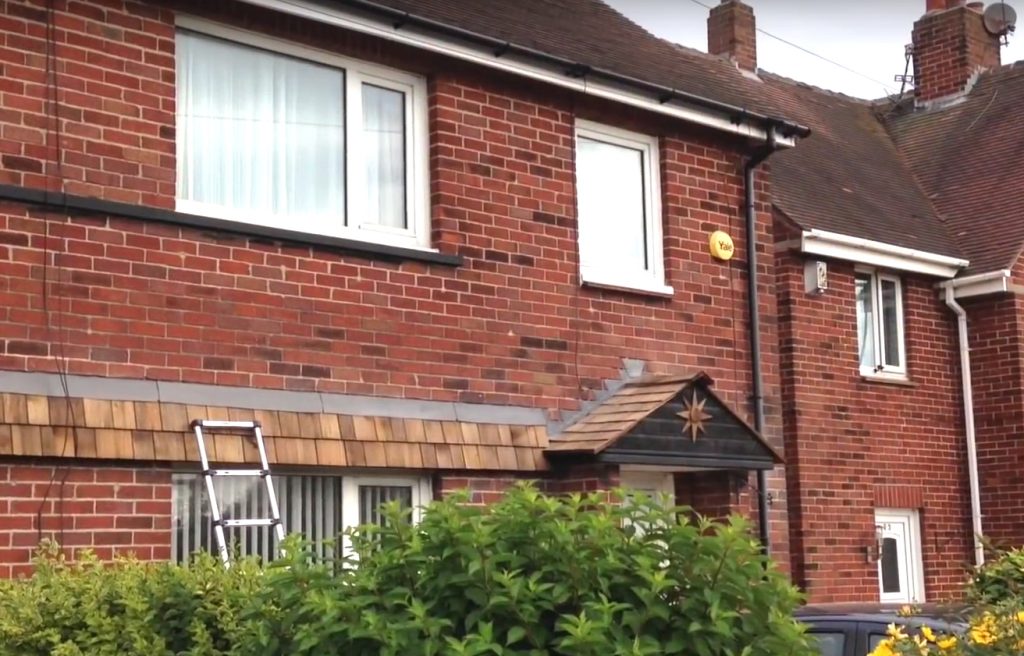
Before we go any further, watch my video ‘DIY Porch Roof. Building a simple pitched roof step by step? below:
Why choose a pitched roof design?
I didn’t go into this in the video, but before choosing a pitched roof design, I considered various other roof shapes and weighed up the pros and cons of each. I chose a pitched gable roof design for the following reasons:
Aesthetics I thought it would look good!
Rainwater Management By building a pitched gable roof, the amount of water being shed on top of anyone entering the house was reduced. Because the rainwater is diverted out to the sides of the porch, there was no need for the extra complication, and expense, of rainwater guttering. In fact, I have plants at either side of the porch, extra rainwater is diverted to them directly from the roof, which works out perfectly.
Ease of build Building this pitched roof turned out to be really easy, just as I had imagined at the design stage.
Building a pitched roof: Step by step
My DIY pitched roof building technique can be summarised by the following steps:
- Step 1: Visualise your roof and evaluate different shapes This is an important step and it is worth spending some time on it. If you live with someone, I also think it is important to involve your other half at this point. It is a brave man who builds something like this without consulting his wife! (No offence to any ladies reading this – I know you are capable of building roofs too – I’m just referring to the majority…)
- Step 2: Choose your materials I hate painting. I already have enough to do in my life, without creating extra work for myself in the future. As a result, I chose cedar shingles and charred wood – both of which can be left untreated. You may choose to use roof tiles, and for the siding on the gable you can use PVC, for example, which also does not require further maintenance. I wanted a more rustic look but you can choose whatever materials you like. I got the structural wood (4″ x 2″ for the main structure, shiplap redwood cladding for the gable, and roofing battens for the… you guessed it… roof battens!) from a local timber supply place at a good price. The cedar shingles I bought online at the best price I could, as these were not available locally. They come delivered on a pallet, and this was actually really convenient.
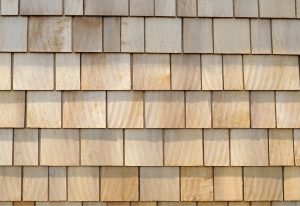
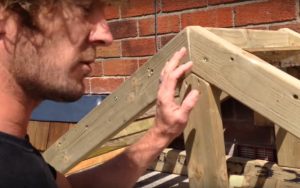
I just love the look of cedar shingles! - Step 3: Mark out the Roof I measured the centre of the concrete slab flat roof, transferred the line to the wall, and then used a plumb line to carry the line up the wall over and above where the roof apex would end up. I then chose the pitch of the roof by eye. Actually, I did this with the help of Rossella and her “8 years of technical drawing experience” (Ro brings up how great an eye she has for getting things straight [thanks to her 8 years studying technical drawing at school 😀 ] every time I do a job… It’s kind of like having a quality control inspector on site…) I then marked out where to cut the wood.
- Step 4: Cut the structural wood for the roof With the first chord marked out, I used a reciprocating saw to cut it out. I then used this first as template to cut a further three. Laying these on the floor, and lining them up to match the width of the flat roof, I could then complete the structural sections, including the bottom chords and kingposts, and screw them all together with long wood screws. I used turboscrew type wood screws, which can be used without drilling pilot holes. You can buy them on Amazon.
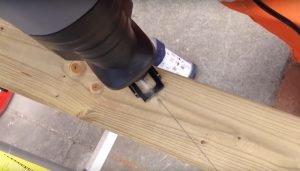
Cutting the timber with a reciprocating saw. This was the first time I had ever used one – they are excellent! - Step 5: Ridge beam I then placed the two triangular sections temporarily on top of the flat roof in order to measure the dstance between them. This would be the length I would need to cut for the ridge beam. I then cut a section of 4″ x 2″ timber, and used galvanised steel 90 degree brachets to fix the ridge beam in position. I also used offcuts to strengthen the corners, to reduce wastage and to stiffen the whole structure. (N.B. This is a small, non structural, pitched roof. If you are building a bigger roof or don’t have the luxury of a having a concrete roof as a base, then you will need to design your roof to suit your application – if you were to just ‘scale up’ my design, it may end up beeing too weak for your application.)
- Step 6: Roof battens I then measured, cut, and then added the roof battens to the roof structure. (The spacing of these is determined by your eventual roof covering.) Once these were fitted, the roof structure was very stiff and easily handled. I then fixed the whole shebang into position using wall plugs, screws, and galvanised steel brackets. This roof has to be able to withstand the 100 + mph winds we get in Blackpool every winter, so I was sure to fix it firmly.
Taking shape…
- Step 7: Fit the lead flashing and cedar shingles This is a really satisfying part of the job. Cedar shingles are a dream to work with – I love using them on home improvement projects. They need no protective treatment as the wood itself has a high tannin content. They can last 80-100 years with zero maintenance, and I think they look great! In the video I show you how I cut the shingles to size, fitted them in position, and also how I was able to ‘manufacture’ ridge tiles from ordinary cedar shingles. This saves you money as if you do this you don’t have to buy the pre-made ridge tiles.
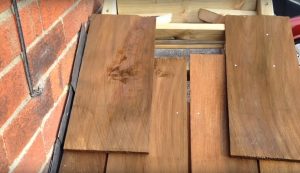
Fitting the cedar shingles… - Step 8: Fit the siding to the gable I then nailed the shiplap siding onto the gable of the roof (For the record, all the nails I used on this job were stainless steel annular ring nails). Again, I wanted a finish I would never have to touch again so I decided to use the following technique to treat the wood: Shou Sugi Ban – Charred wood effect. (Instead of painting it, I set fire to it!…)
- Step 9: Finish the siding with something cool! I could have left the black siding as it was but I wanted to add a compass symbol made out of cedar shingles. This will turn a light silver colour (along with the rest of the cedar shingles) over time, and will contrast really nicely against the charred wood siding.
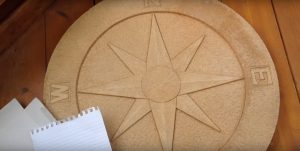
I used this compass design from a flagstone as a template… - Step 10: Step flashing The cedar shingles immediately adjacent to the wall are laid with lead ‘soakers’ underneath. However, to completely waterproof the joint a ‘step flashing’ must be placed over the top of the lead soakers. (I got all the information regarding the leadwork from fixmyroof.co.uk) I used an angle grinder to remove the mortar, cut the step flashing, and then installed the lead.
- Step 11: Mortar up and admire your new roof I then used a lime based mortar to ‘mortar up’ around the flashing. It was then time for a very satisying cup of tea, admiring my first ever DIY roof. Brilliant!
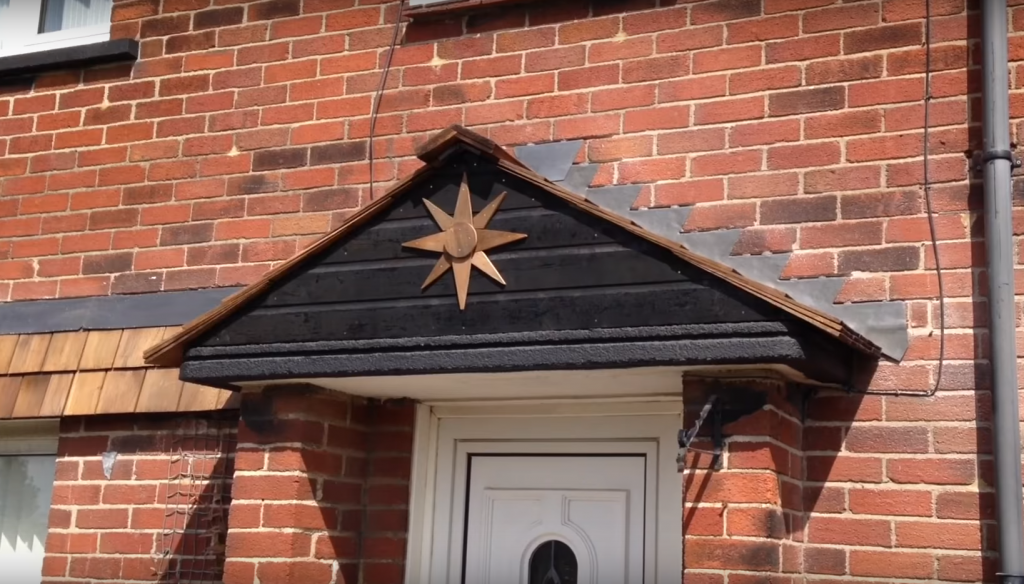
I am very happy with how this roof turned out and I think it will work very well for this specific application. It is a non-structural roof, but I can happily walk about on top of it should the need arise.
I chose not to use a waterproof breathable membrane under the shingles, (as would be the standard practice these days), because I don’t need one! I have a perfectly good flat roof underneath this, which will continue to do the job it has done for the last half a century, with the pitched roof on top as an added extra. By not fitting a membrane, I massively increased the airflow under the shingles. This, coupled with the numerous gaps in the structure caused by my less than perfectly accurate cutting(!) will combine with the ventilation bicks inside the ‘roof space’ and ensure that the fresh Blackpool winds keep the roof timbers dry and rot free in the years to come.
Aesthetics are a personal thing, and I don’t expect everyone to love my little roof. However, Rossella and I love it and that’s all that counts!
I hope this post and video have been useful to you. Will you be making a DIY roof? Are you a roofer with some helpful tips to offer?
If you have any comments or questions then please feel free to add them below and if you enjoyed this post then share it on social media to help me put food on our dinner table.
Cheers!
Chris 👍
![]()


Your roof is so adorbs.! There’s something of a personal touch out of it.