• HOME
  • ABOUT
  • CONTACT
  • Terms and Conditions
    • Copyright
    • Disclaimer
    • Disclosure Statement
    • Privacy and Cookie Policy

RandomChris.com

Sailing, Travelling, DIY, Adventure, Financial Freedom and more!

  • SAILING / BOATING
  • DIY
    • CAR MAINTENANCE AND REPAIR
    • HOME IMPROVEMENT
  • ADVENTURE
  • TRAVELLING
  • FINANCIAL FREEDOM
  • RANDOMNESS

DIY Cavity Tray Installation (Type E Cavitrays)

16th December 2016 By Chris Leave a Comment

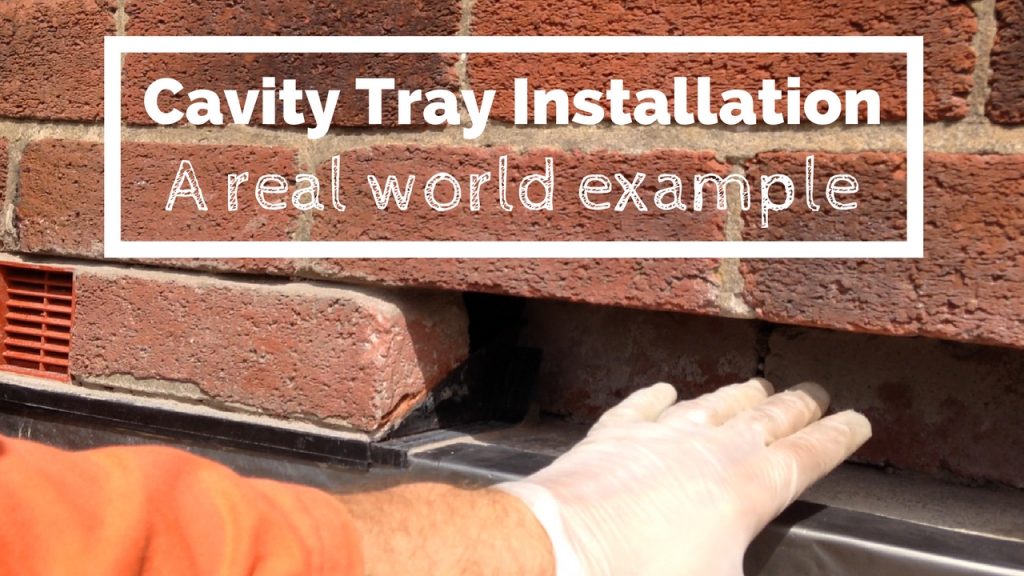
Cavity Tray Installation DIY

Cavity tray installation – these three words might not exactly fill you with excitement but, if you would like to live in a damp-free home, this article is worth a read!

What are cavity trays?

Cavity trays are pre-formed polypropylene trays. They are installed into the external bricks of a cavity wall and their purpose is to collect any water dripping or running down the cavity. Correctly installed cavity trays collect this water and transport it back to the outside of the bricks – rather than allowing it to migrate onto the inner leaf of bricks, which would cause damp issues in the property.

In my case, I had damp coming through the front wall of our house in Blackpool (a town on the North West coast of England which receives plenty of wind-driven rain). The property has concrete lintels running across above the windows and – as the property was built before cavity trays were available – these lintels had lead flashing incorporated to prevent water ingress. Unfortunately, the lead flashing was installed in long sections  of up to 3 metres long. Modern building regulations specify that lead should be laid in strips of 1.2 metres long maximum to allow for differential thermal expansion and contraction. Over the course of several decades, the lead flashing had developed cracks. As a result, the moisture in the cavity was therefore not being expelled properly, hence the damp on our internal wall.

In the past I have found it difficult to find trustworthy tradesmen (I’m biting my tongue here as I like to do my best to always be positive…) so I decided to tackle this job myself. In case you haven’t noticed, I have a habit of doing this!

So, I set out to resolve this problem and decided to replace the damaged lead with modern cavity trays. This involved removing 23 bricks in a line across the front of the property (a few at a time – otherwise I could have become ‘that bloke who made the front of his house collapse’). If you want to know how I did this then please see this post. Removing the bricks the way I did meant that I didn’t have to source replacements, which saved me a ton of hassle, as the old imperial sized bricks used to build my house are no longer available.

As per my normal modus operandi, I scoured the internet for cavity tray installation information. All the YouTube videos I found about cavity trays were computer animations, rather than proper videos, so I decided to film my cavity tray installation procedure and upload a real world example video to YouTube. It’s had a few thousand views already, so hopefully it is proving useful to someone.

Watch my video ‘DIY Cavity Tray Installation (Type E Cavitrays)‘ below:

So, to recap, the cavity tray installation process can be summarised as:

  • Source some cavity trays to suit the application (they come in various formats, for different applications)
  • Measure and plan the job several times over before you go any further (a ‘think twice, cut once’ type approach is always prudent!)
  • Remove the necessary bricks
  • Thoroughly clean out the cavity
  • Test fit the cavity tray (if the tray is ‘interfered with’ by wall ties, you may need to judiciously modify the tray in order for it to fit)
  • Bed the cavity tray on mortar
  • Reinstall the bricks and a weep vent with mortar all round
  • Allow the mortar to dry
  • Once the mortar is dry you can ‘move along the line’ and remove more bricks to allow you to install further trays
  • At the end of the job you can point the whole line of bricks together

If you have any comments or questions then please feel free to add them below. I hope this post has been useful to you and if so, please share it on social media to help me put food on our dinner table!

Cheers!
Chris 👍

Christopher Barr Gravatar

'Pay it forward' by sharing this post... Share on twitter
Twitter
Share on google
Google
Share on reddit
Reddit
Share on facebook
Facebook
Share on stumbleupon
Stumbleupon
Share on tumblr
Tumblr
Share on pinterest
Pinterest
Share on email
Email

Filed Under: HOME IMPROVEMENT Tagged With: building, how-to-guide, tutorial, video, youtube

Leave a Reply Cancel reply

Your email address will not be published. Required fields are marked *

This site uses Akismet to reduce spam. Learn how your comment data is processed.

Join the crew!

Subscribe to receive my email updates. You'll never know what I'll be up to next!

Your email is safe with me.

arrow-rusticarrow-rustic

Social

  • YouTube

Tip Jar Image

Randomness

how to cure a sinus infection with a homemade neti pot

Suffering From Sinusitis? Check Out This Homemade Neti Pot…

22nd April 2017 By Chris 1 Comment

If you are suffering from a sinus infection (aka sinusitis) you need to read this post! I spent 9 days suffering before this simple DIY neti pot and homemade … [Read More...]

Ammo can rocket stove mk II build

How I built my ammo can rocket stove – a small homemade wood stove (Mk II)

5th January 2017 By Chris 23 Comments

In this post I'll explain how I built my Mk II ammo can rocket stove. This is a small, inexpensive homemade wood stove which burns wood, without smoke, thanks … [Read More...]

Join the conversation

  • Chris on Boat solar panel installation: How to fit BIG solar panels on a SMALL boat
  • Chris on How I built my ammo can rocket stove – a small homemade wood stove (Mk II)
  • Chris on How I built my ammo can rocket stove – a small homemade wood stove (Mk II)
  • Jim on How I built my ammo can rocket stove – a small homemade wood stove (Mk II)
  • Yuji FURUHASHI on How I built my ammo can rocket stove – a small homemade wood stove (Mk II)
  • Mike on Boat solar panel installation: How to fit BIG solar panels on a SMALL boat
  • Joshua Peters on My ammo can stove. A homemade wood stove (rocket stove) with a secondary burn system.
  • Sid Saunders on My ammo can stove. A homemade wood stove (rocket stove) with a secondary burn system.
  • Gary Wells on My ammo can stove. A homemade wood stove (rocket stove) with a secondary burn system.
  • Matt on My ammo can stove. A homemade wood stove (rocket stove) with a secondary burn system.

Thank you!

Christopher Barr GravatarThis is just a quick note to thank you for being you here on my website. I appreciate you!

If you really want to make my day then please subscribe to my newsletter. This says to me: 'I really enjoy what you are doing and I want more'. Who wouldn't love that?!

This means I can send you an occasional email with updates as to what I've been up to. They say variety is the spice of life and you'll get plenty of variety with me!

Go on: Join the crew!

Cheers!
Chris

Search RandomChris.com

  • YouTube

Latest posts

  • How To Make A Folding Boat!
  • Screw Extractor How To: Using an Easy Out to Remove a Broken Bolt From an Engine Block
  • How to Rebuild a Brake Caliper (Without Removing it From Your Car!)
  • We’re selling our boat! ***NOW SOLD***
  • Suffering From Sinusitis? Check Out This Homemade Neti Pot…

As an Amazon Associate I earn from qualifying purchases

Copyright © 2025 · Magazine Pro Theme On Genesis Framework